Today I want to share a little bit about my Micro Four Thirds lenses and body setup that I bring on many different scenarios that I encounter. My goal with this post is to provide you an insight and inspiration in terms of what gear to bring depending on the needs and situations.

The Bodies
I have three bodies that I currently use: Panasonic GX8, Panasonic GX7, and Olympus E-PL6. All three bodies serves three different purposes in my photography needs.
The GX8 acts as the serious main body that will handle both still photography as well as video. It is being employed mostly for travel and for serious photo-shoots. With the high-performance capabilities that the GX8 offers, it's very logical to use it as my primary camera. The 4K video feature of this camera makes it instantly my go-to video camera for some video project. The main lenses that I usually put on the GX8 is the Panasonic 12-35mm f/2.8, Panasonic 14-140mm f/3.5-5.6mm, and the Panasonic 100-300mm f/4-5.6.

The GX7 acts as a blindspot cover for the GX8 most of the time, so it will wield lenses that will cover a different set of focal length from the focal length of the lens that's attached to the GX8. But from time to time, I also found out that the GX7 is small enough to be put inside a small bag, so I now use it as a casual camera to carry-around too, especially when coupled with small prime lenses. When I am shooting with the GX8 seriously, the GX7 is usually coupled with Olympus 75mm f/1.8, or Panasonic 7-14mm f/4, or Olympus 45mm f/1.8 to cover the blind spot of the 12-35mm f/2.8. When I'm shooting casually with only the GX7, I usually coupled the GX7 with Panasonic 20mm f/1.7 II, Olympus 17mm f/1.8, Olympus 25mm f/1.8 or the Olympus 45mm f/1.8.

The E-PL6 on the other hand, act fully as a compact camera replacement. Yes, the GX7 is small enough for most situations, but it is still quite a chunky camera that's gonna fill up your small bag tightly. That's when the E-PL6 comes in. Now you might ask, why not a Panasonic Lumix GM1 or a GM5 instead? Sure, they are smaller and they are more capable, but both don't have in-body stabilization, which is crucial to my photography needs. They also aren't that much smaller compared to the small E-PL6. The E-PL6 might not carry the most advanced body stabilization in the market, but being able to shoot at slower shutter speed even for only 1 or 2 extra stops is much better than not being able to shoot at slower shutter speed at all. The lens that I use most of the time with the E-PL6 is surprisingly the Panasonic kit lens 14-42mm f/3.5-5.6 II that comes with the GX7. I also use the 20mm quite regularly on the E-PL6 too, and also the Olympus 17mm, 25mm, and 45mm f/1.8.
The Lenses

Panasonic 12-35mm f2.8
Olympus 75mm f1.8
Panasonic 14-140mm f3.5-5.6
Panasonic 20mm f1.7 II

Other lenses in my collections are that are not my workhorse but I use quite often also are:
Panasonic 45-150mm f4.0-5.6
Olympus 17mm f1.8
Olympus 25mm f1.8
Olympus 45mm f1.8
Panasonic 7-14mm f4
Panasonic 100-300mm f4-5.6
Panasonic 14-42mm f3.5-5.6 II
My Usual Setup
You may be wondering, I'm not a professional photographer, but why do I have all these lenses and bodies? The answer is simple: I pursue high quality photos as a documentary of my life. I want to have all these photos of everything in my life with such professional high image quality.
Speaking of professional photography, I do occasional serious photo projects quite frequently too, and although those are not paid projects most of the time, my photos do get published or printed as the results.
As many of you undoubtedly know, Micro Four Thirds users are blessed with the presence of many high quality lenses and plenty of high performance bodies that are mostly smaller than the equivalent counterparts on both APS-C and full frame. Although the recent offerings in both bodies and lenses are keep getting bigger and heavier in size, the timeless classic lenses are mostly small and lightweight while the bodies can be either big or small depending on what you need. A Panasonic GX7 with 14-140mm f3.5-5.6 is smaller than Sony A6000 with the 18-200mm f3.5-6.3. A Panasonic GX8 with 12-35mm f2.8 is still smaller than Canon EOS 100D with 18-55mm f3.5-5.6.
As many of you undoubtedly know, Micro Four Thirds users are blessed with the presence of many high quality lenses and plenty of high performance bodies that are mostly smaller than the equivalent counterparts on both APS-C and full frame. Although the recent offerings in both bodies and lenses are keep getting bigger and heavier in size, the timeless classic lenses are mostly small and lightweight while the bodies can be either big or small depending on what you need. A Panasonic GX7 with 14-140mm f3.5-5.6 is smaller than Sony A6000 with the 18-200mm f3.5-6.3. A Panasonic GX8 with 12-35mm f2.8 is still smaller than Canon EOS 100D with 18-55mm f3.5-5.6.
In the following part of this blog, I will post my setup, along with my thoughts and some sample photos of what the setup can produce during that particular situation. So here you go, these are all of my setups:
Casual Outing, Dinner, Nothing Serious

Carrying solution: no bag, just slip all the gear into my cargo short pants pocket.


The key here is to stay light, and just snap once in a while only when you think it's worth to photograph. This is a casual outfit, the camera and lenses must not get in your way, and you'll want to spend as little time with the camera as possible. The 17mm and the 20mm will be more than adequate for a group photo in a restaurant. The 25mm will be a bit too difficult for tight group photo, but you can certainly use it for food photo or things like that.
Casual Daytime Outing, Lunch, Nothing Serious

Carrying solution: no bag, just slip the gear into my cargo short pants pocket.


Same as before, the key here is to stay light. The 14-42mm will shoot anything during daylight, and you'll be covered in terms of focal length. This setup is also good for street shooting if you are walking around the town.
Shooting Concert

Panasonic GX7 with either 45mm f1.8 or 75mm f1.8
Carrying solution: a Billingham Hadley Small or similar small bag is used to carry all the gear.


People don't usually allow photograph during concert, but once in a while they will allow you to come in with your cameras as long as you don't do video and don't use flash. However, we're not the professional concert photographer and most of the time you'll be sitting/standing far away from the stage. This setup will allow you to get the reach that you need with both focal length and large aperture. Snap your camera on aperture priority and select auto ISO, and let the GX7 and GX8 choose the best ISO and shutter speed while the stage lights goes crazy bright or crazy dark, and shoot away!
Shooting Landscape or Interior/Real Estate

Panasonic GX7 with 7-14mm f4
Tripod
A set of ND grad, ND, and polarizing filters
Hitech filter holder
A spare YN510EX flash just in case I need a fill light
Carrying solution: a Billingham Hadley Small or a slightly larger bag is used to carry all the gear.


The concept here is to have the 12-35mm on the GX8 as the first choice, and if it's not wide enough then you'll take out the GX7 with the 7-14mm without having to change the lens. You don't always know if 12mm is wide enough or not, so let the 7-14mm cover the blind spot.
Shooting Portrait on Location

Olympus E-PL6 with Olympus 45mm f1.8
20mm f1.7 as a backup wide lens
A bunch of flashes and remotes if needed
Carrying solution: a Billlingham Hadley Small is used to carry all the gear.


The concept here is to shoot tight portrait using mid-tele lenses. For the wider half-body portrait, use the 45mm f1.8, and for the tight headshots, use the 75mm f1.8. You'll probably end up not using the 20mm but when the location calls for some fashion back-dropped fashion-styled environmental portrait, the 20mm f1.7 will probably save your life. It's small and light, you won't feel it in your bag.
Serious Event Documentary/Wedding or Serious Photo Session Setup

Panasonic GX7 with 75mm f1.8
A spare Olympus 45mm f1.8.
A bunch of flashes,
Umbrella,
Flash Benders and/or other modifiers
YN RF603CII remotes
Lightstands if needed.
Carrying solution: multiple bags are used to carry all the gears. Neck straps are worn with the two bodies and lenses slinged in my body without bag during the actual shooting session.


There's no secret here. This is equal to dual bodies with 24-70mm f2.8 and 150mm f1.8 on full frame setup, but in a much lighter weight. I should probably have the Panasonic 35-100mm f2.8 instead so that it can act as the 70-200mm f2.8, but the 75mm f1.8 has larger aperture and it has proven to deliver ultra satisfying results so far, so I don't plan to buy the 35-100mm f2.8 just yet.
Travel Setup Casual

Panasonic 20mm f1.7
Olympus 45mm f1.8.
A spare flash just in case
Carrying solution: sometimes I put those in my Billingham, but other times I'll just carry them on my cargo short pants pocket.


This setup is again emphasizing on lightweight and portability, but without compromising quality. Even with just a single body with two prime lenses, you can cover so much during your travel without having to sacrifice too much. I use this setup if photography is not the main purpose of the particular travel.
Travel Setup Semi Serious
Panasonic GX8 and Panasonic 14-140mm f3.5-5.6
20mm f1.7 II as a backup
Carrying solution: all carried with the Billingham Hadley Small or a neck strap.


This setup is when you want to photograph during your travel, but you don't want to carry much gear. Just a single body and lens will let you shoot a lot of stuff during daylight. Take off the 14-140mm and put the 20mm f1.7 at night and you'll be ready to shoot again at night.
Travel Setup Serious

Panasonic GX7 with either 7-14mm f4 or 45mm f1.8
20mm f1.7 II for the GX7 to use at night
Carrying solution: during transportation, I will bring the GX8 and attached lens on the Billingham, and the rest of the gear inside a small carry-on roller suitcase.


Sometimes you just want to carry as much as you can during travel because you know you want and you will photograph a lot of things and photography is your main purpose of the travel. Well, here you go; this setup is basically carrying all that you have during the travel. The only thing missing here is the dedicated flash unit, I don't usually carry them during travel due to the weight constrain, but once in a while I'll just pop in a YongNuo YN510EX, a pair of RF603CII remotes, and a Flash Bender just in case I want to channel my inner David Hobby out. Your total gear weight will be around 4kg, so you'll have to split some of the gear into multiple bags when you are flying or in the airport, so that you'll have spare weight quota for other travel things that you need to carry. Make sure you pack the gear that isn't inside your camera bag in a camera insert so that they are still protected inside your carry-on suitcase or backpack even if the backpack or carry-on suitcase isn't designed to carry photo equipment.
Just for fun, here are some pictures of my Billingham Hadley Small, being fitted to its maximum capacity with all three bodies and a bunch of lenses.
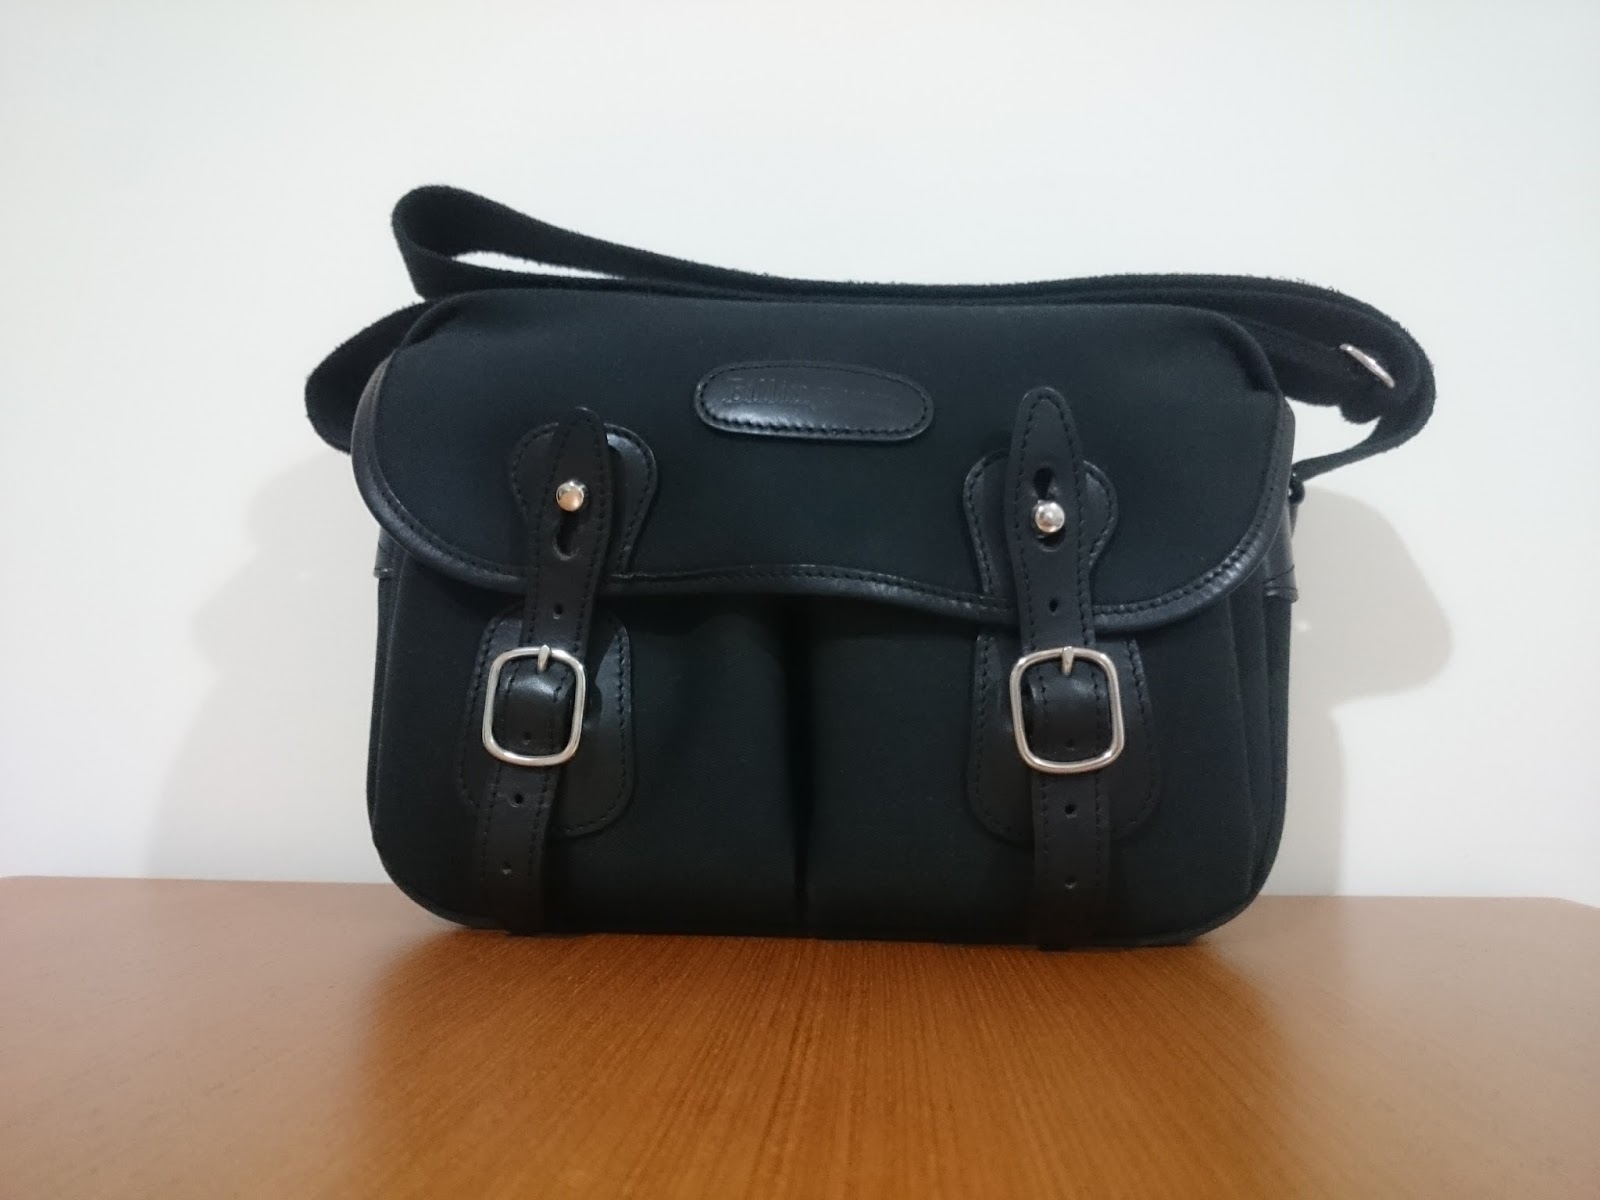

I can fit a GX8 with 12-35mm f2.8 attached, a GX7 with a 75mm f1.8 attached, an E-PL6 with Lumix 14-42mm f3.5-5.6 II attached, a 20mm f1.7 II, and an Olympus 45mm f1.8 with enough room in the Billingham for 3 extra batteries, a Vari-ND filter, a small notebook, a couple of pens, cleaning cloth, and extra memory cards. It weights almost 4kg though with all those items inside the Billingham Hadley Small, which is quite a lot of weight for your shoulder to be honest. But my point is that with Micro Four Thirds you can carry so much more for the same weight compared to other APS-C or full frame systems, both DSLR and mirrorless.

So there you go folks. That's all the Micro Four Thirds gear setup that I usually choose, so now you know what I'm carrying with me on any particular shooting situation. I hope you enjoy this post, and I'll see you on the next one! God bless you.


